(Updated August 27, 2020)
Have you ever wanted to create your own handwritten font?
Guess what – you totally can! And it's surprisingly simple, too, thanks to the internet.
All you'll need are:
- A black pen (the stronger the weight the better)
- A printer
- A scanner
- A computer
- A drawing tablet (optional)
Turning your handwriting into a font makes your design truly unique and will allow you the greatest creative freedom when trying to represent a brand. If you want you can even sell your font.
Famous brands are known to have custom fonts that add extra oomph to their design. Google and BBC are just some of the brands in the long list of examples. Who knows? You might even create the next big font in your spare time.
With your own font, you can send “handwritten” messages to clients and loved ones even when apart.
So go ahead and get scribbling – your font awaits.
Here are simple steps you can accomplish in minutes.

Step 1 – Practice makes perfect
Practice your handwriting. Think about what style you want it to have. Will it be serif, sans serif, or script font? You can even study other typefaces and see what you prefer.
Spend time on this step to make sure you end up with exactly what you need. But don’t worry too much about it.
Pro tip: Straighten it out
You can use a ruler to create stable strokes. This will result in a near and clear glyph.
Step 2 – Hello, font template!
You can download a template from Calligraphr.com. A DIY font template will help guide you and make scanning easier. Using a template will also help you remember to write all the necessary punctuations.
Simply launch the app and go to the Templates tab to download the template and print it. In terms of language, you have template options dedicated to English, German, Japanese, and more.
Step 3 – Write

Write out the alphabet and numbers, as well as any symbols you want using a black pen.
Take note that you are scanning this, so make sure the pen is not a regular ballpoint – use a felt point pen. These have weights ranging from 0.1-5. Remember the thinner the point, the less likely you'll end up with a clean scan.
Alternatively, you can use a drawing tablet if you happen to have one around. This will allow you to digitally.
Also make sure to write the letters in the auxiliary lines (the faint, dashed lines), otherwise, they will be cut off when your font is created.
Step 4 – Scan

When scanning, make sure the file is at 150 dpi up to 300 dpi. The maximum file size is 6MB with max dimensions 6500 x 6500px. You may save the file as a jpg, png, pdf, or tiff.
Sometimes scanning an image makes an image grainy and grey. Luckily, the tool automatically cleans your file for you. This functionality will result in cleaner and sharper characters.
If you’re doing this process digitally, just save your file in PNG or JPEG.
We’re ready to head onto the next step.
Step 5 – Upload your font
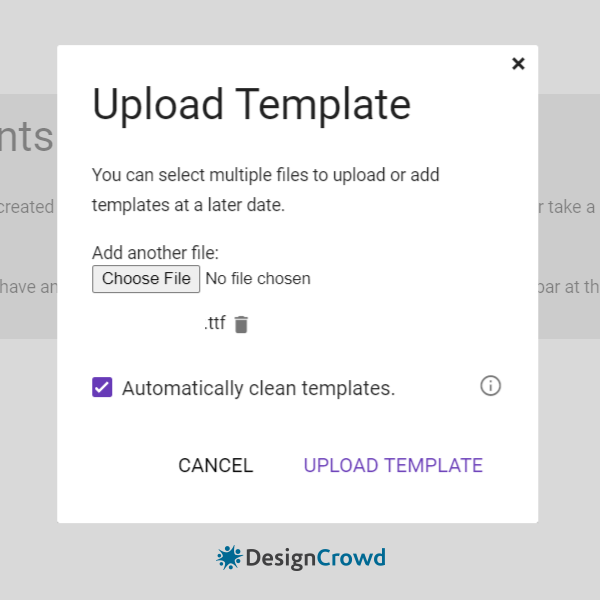
Go to Calligraphr’s My Fonts tab, upload the file, and get ready to build your font!


You can find the download links right under the “Font files” headline for easy navigation. Then choose your output format, either .ttf or .otf.
For reference here’s a quick guide on their difference:
- TTF (TrueType Font) – Can be used for both Apple and Windows. Great choice, if you have limited experience working with and installing fonts.
- OTF (OpenType Font) – a newer version of TTF. It can be used for both Apple and Windows. Allows type designers more freedom to include small caps, alternate characters, and so on.
Step 6 – Install your font
Apple
Open Font Book then File > Add Fonts (cmd + O)
Windows
Click Start > Control Panel > Appearance and Personalization > Fonts. Click File > Install New Font
Step 7 – Completion
Yay! You created a font. Congratulations! Now place it in designs to truly make them your own.
Want More?

Written by Divya Abe on Tuesday, March 15, 2016
Divya Abe is an expert graphic designer ready to share her knowledge with the crowd. Besides spending quality time on the internet she enjoys anything to do with cats. Get in touch via Google+.
